


A developer’s guide to Azure tools
The Azure platform includes a plethora of different tools for developers to use to optimise their cloud operations.
I use a small number of tools every single day when working on our clients’ applications. These allow me to troubleshoot and identify application issues, edit files, install extensions, and easily restore deleted files.
Here are the essential tools I use on a daily basis on the Azure platform – I’ve narrowed it down to my top 5:
1. Kudu
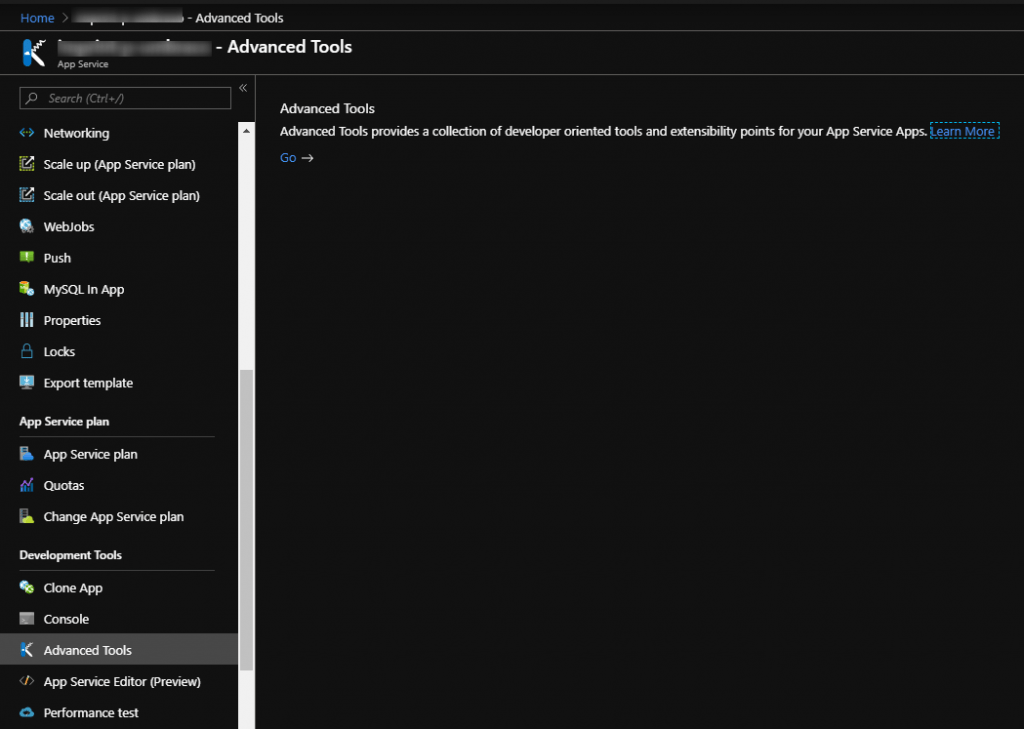
Kudu has a set of very useful tools to help you troubleshoot and analyse your application hosted in Azure App Service. It is useful for capturing memory dumps, viewing configurations, accessing your application files and so much more. To open Kudu console, go via Advanced Tools under Development tools section in the left-hand side panel when viewing your App Service in the Azure Portal.
Alternatively, you can navigate to https://<my_site>.scm.azurewebsites.net (the name of the App Service is <my_site>), log in with your credentials to the Azure Portal, and once authenticated, you should see something similar to the below:
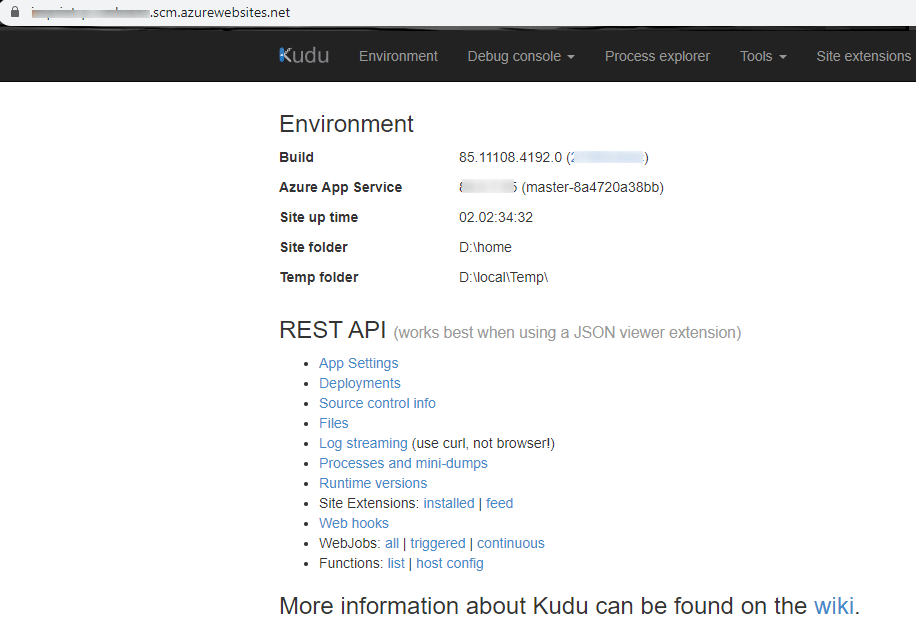
The Environment tab will list system info, AppSettings, Connection Strings as well as Environment variables. I personally use a lot of the Debug Console where I can explore my application files and run command in PowerShell against my application.
2. App Service Editor
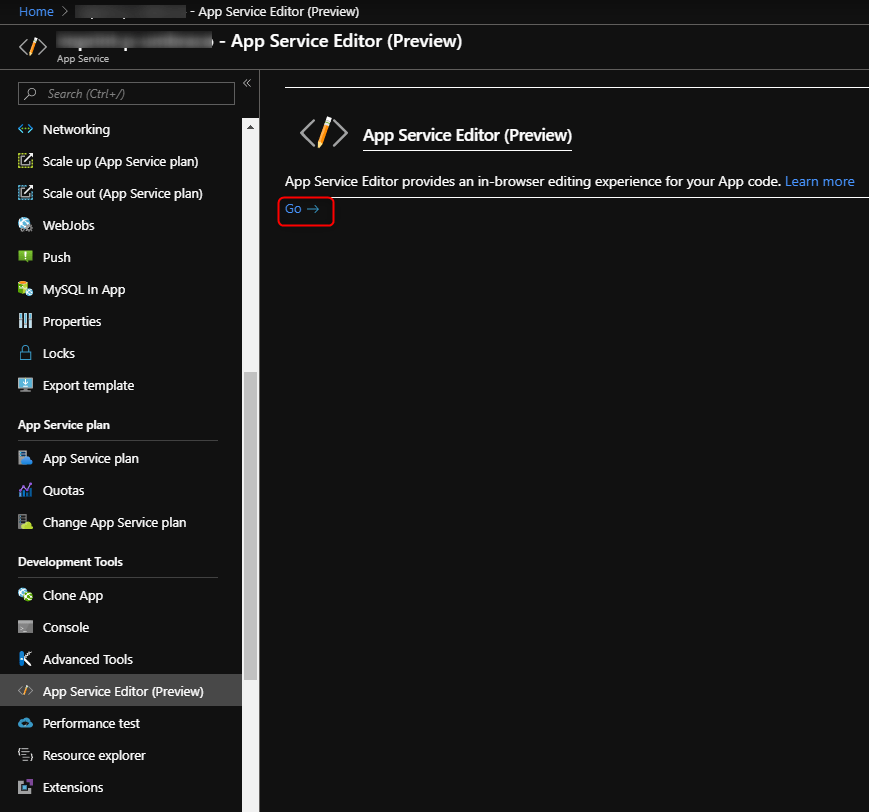
App Service Editor provides a Visual-Studio-like web-based editor to quickly edit the App Service. To open App Service Editor, open your App Service, then find it under the Development Tools section on the left-hand side blade.
It is very useful to be able to create and edit HTML, CSS, Javascript, Configuration files and so on. The files are auto-saved and changes are reflected on the fly to your App Service, so I don’t suggest using it on the Production environment. But on the non-Prod environment, it can come in very handy for a quick test.
3. Application Map in Application Insights
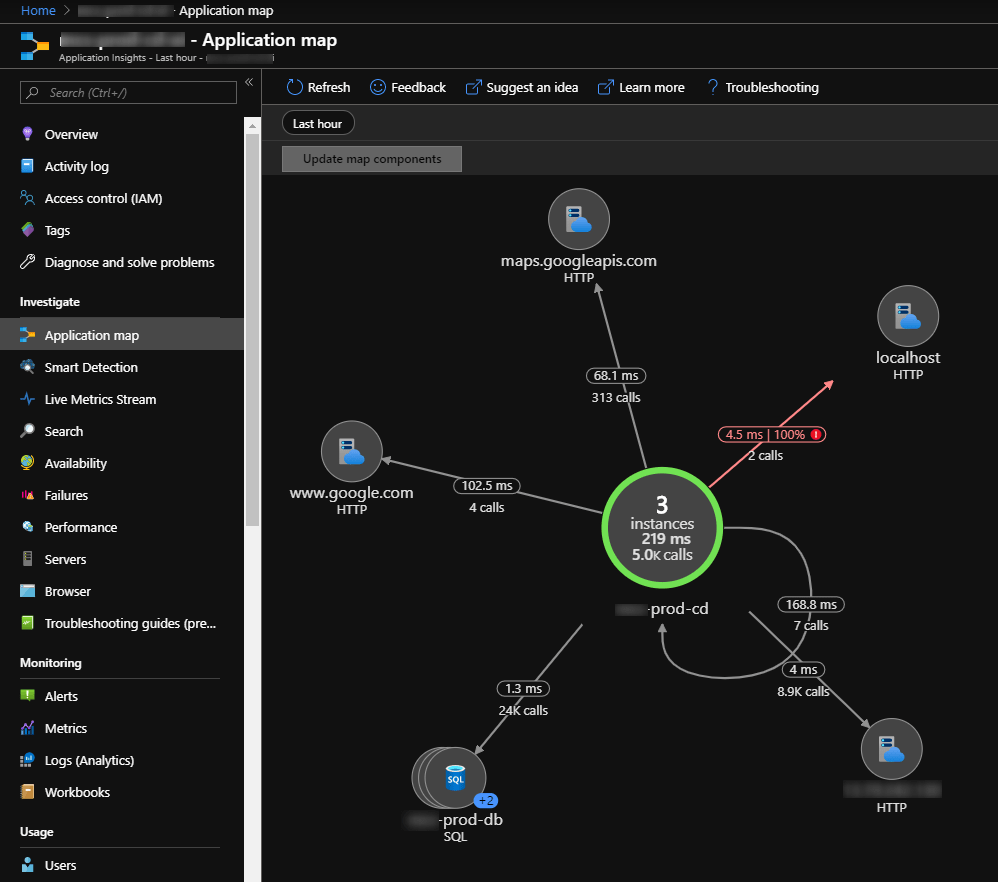
The Application Map automatically discovers the topology of your application and lays the performance information on top of it. It presents a clear view of dependencies in your application. All of this makes it much easier to find problems in your application and diagnose them by drilling into each component in the topology. You can find the Application Map within your Application Insights by clicking on the Application Map under the Investigate section.
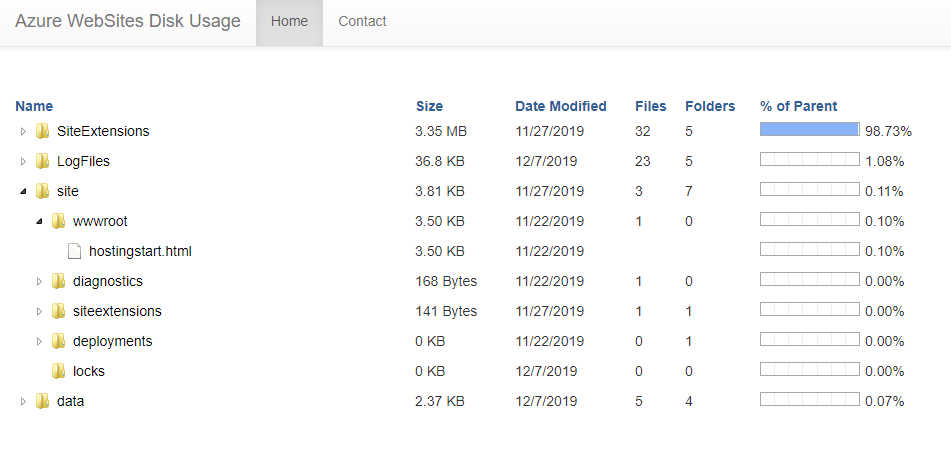
4. Azure Web Apps Disk Usage Site Extension
We recently had a problem where the Azure App Service backup failed due to the content being larger than 10GB, which is the threshold for the Azure App Service backup. When I went to the Debug Console in Kudu, it didn’t give me the size of each folder due to some folders being too big (I presume). That’s when I discovered this extension, and it worked like a charm!
Firstly, you need to install this extension by going to Kudu and clicking on Site extensions in the top navigation, search for Azure Web App Disk Usage Site Extension in the extension gallery and install it from there. After the installation, you will need to restart the site by clicking on the restart site button on the top right corner. This will restart the SCM site, but it will not restart your App service or your application, so don’t worry! Once the extension is installed, click on the play button – this will start calculating the size of all the folders in your App Service and displaying it nicely.
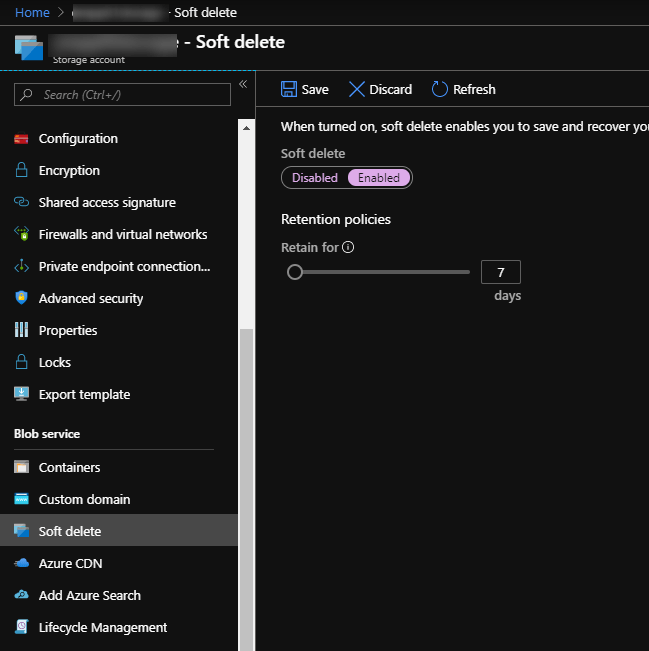
5. Soft delete for Azure Storage Blobs
Azure Storage allows you to soft delete blobs so that you can easily restore accidentally deleted or modified files. When this feature is turned on, you will be able to recover your data where the blobs or blob snapshots were deleted or modified within any time of the retention period set for the soft delete feature. By default, it is disabled. To enable it, go to the storage account that you want to enable Soft Delete. You will find it under the Blob service section, then simply change the toggle to Enabled and set the retention period of your choosing -between 1 to 365 days.
Hopefully, this has given some ideas on new tools to try out on the Azure platform, whether you manage your own cloud, use an MSP, or are considering making the switch to a managed provider.
Questions about Azure? Find out more here or get in touch with our expert team today.